

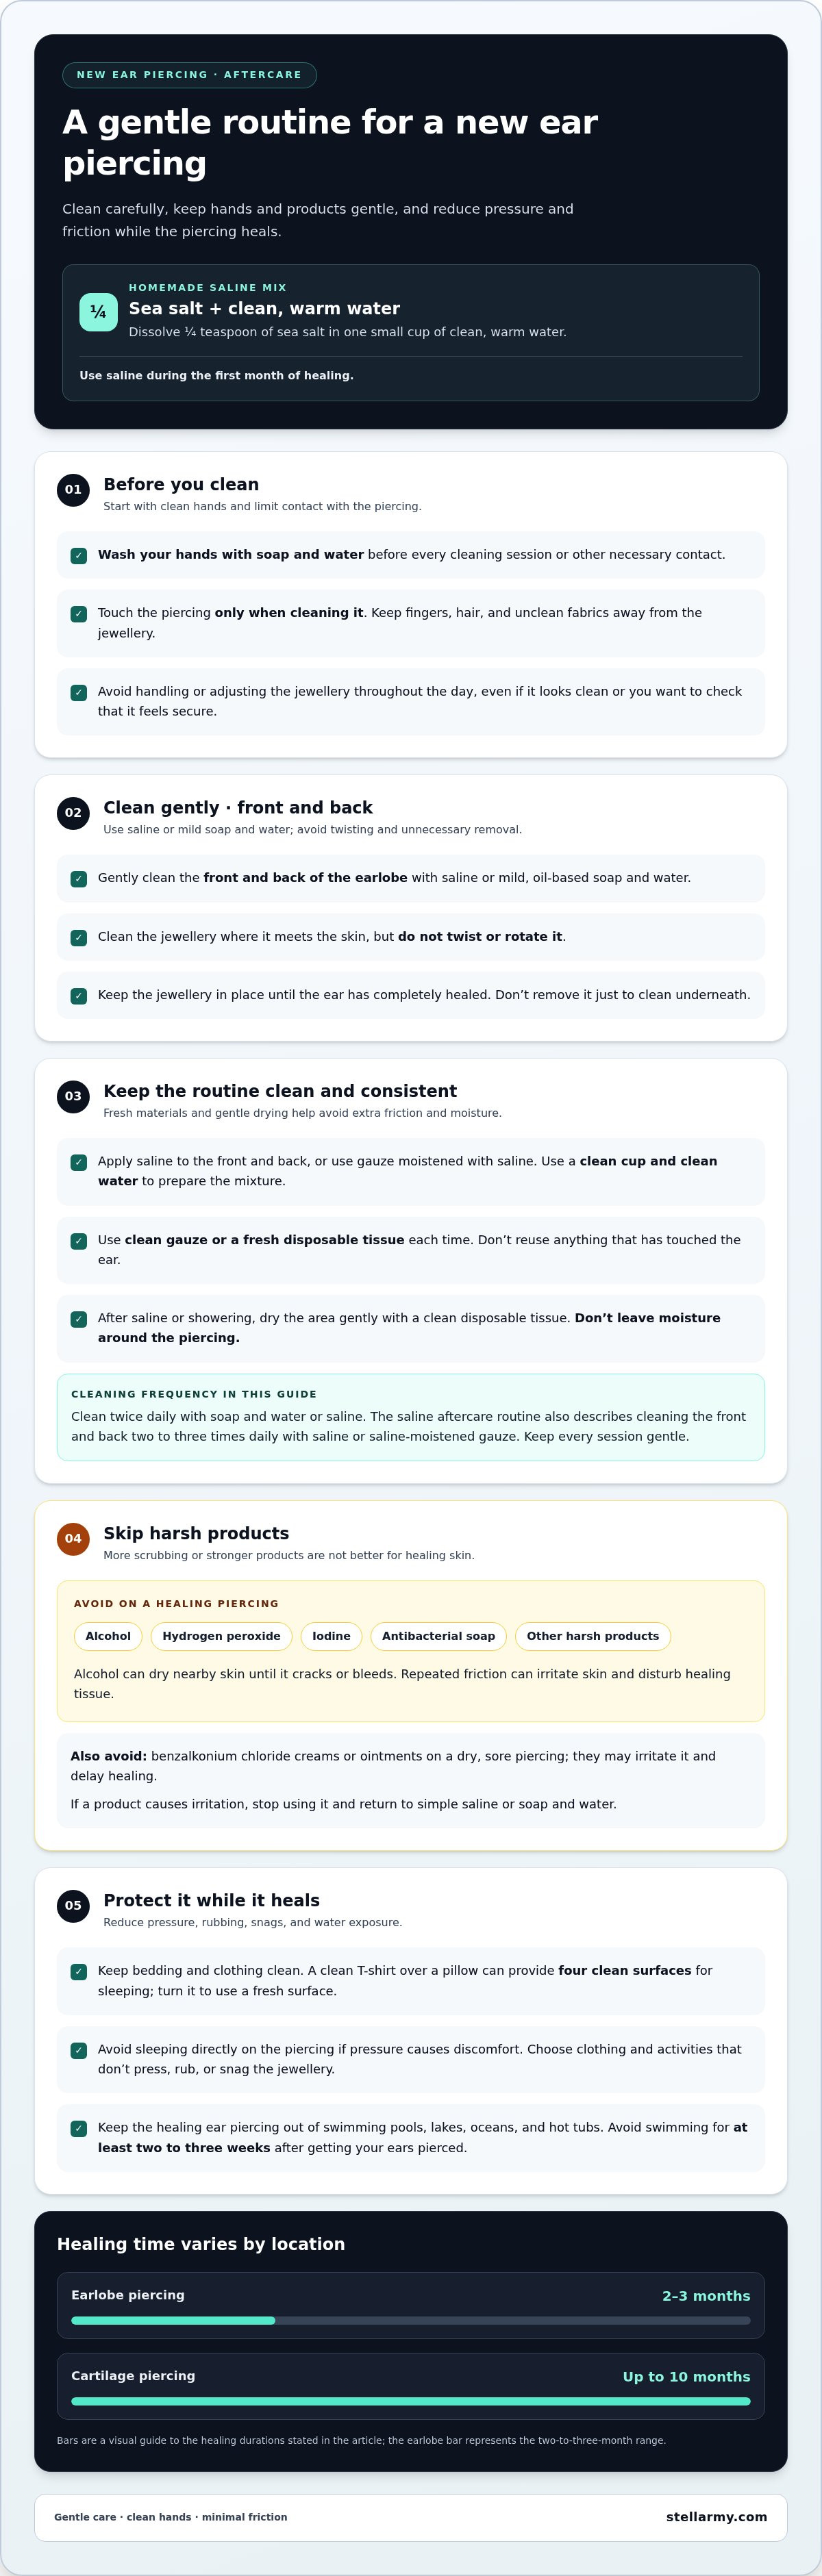
For a saline soak, dissolve ¼ teaspoon of sea salt in one small cup of clean, warm water. Wash your hands first, and use saline during the first month of healing. Avoid alcohol, hydrogen peroxide and twisting the jewellery, as these can irritate a fresh piercing.
It’s natural to want a clear routine, especially when the area is tender. Good piercing aftercare is simple: clean gently, avoid unnecessary touching, and keep pressure and friction away from the piercing.
This guide explains how to prepare and use a saline soak, protect a new ear piercing during everyday activities, and recognise signs that may call for medical attention. You’ll also learn why hygiene matters before and after piercing, so you can follow practical steps without overcomplicating the healing process.
Key Takeaways
- Reduce pressure and friction around a healing piercing by adjusting sleep habits and protecting it from snags during daily activities.
- Watch for jewellery that feels tight or begins to sink into the earlobe, and act promptly if the skin changes around it.
- Know which changes may signal a piercing problem, and seek medical help if symptoms worsen.
- Jewellery material matters, especially for people with metal sensitivities; choose an option suited to your skin.
- Good hygiene starts before piercing: sterile equipment and careful handling help support safer healing.
Cleaning a new ear piercing
In Malaysia, the hygiene standard described here is professional ear piercing with sterile equipment, not a named regulation. Clean safely by washing your hands first, then gently using saline or soap and water.
-
Clean the Earlobe and Earrings
Wash your hands before touching the ear, then clean gently around the piercing. Use saline or mild, oil-based soap and water on the front and back of the earlobe. Clean the jewellery where it meets the skin, but don’t twist or rotate it. Leave the jewellery in place until the ear has completely healed, rather than removing it to clean underneath.
-
Set a Cleaning and Drying Routine
Choose a consistent routine: apply saline to the front and back, or use gauze moistened with saline. To make a homemade mixture, dissolve ¼ teaspoon of sea salt in one small cup of clean, warm water. Dry the area with a clean disposable tissue after using saline or showering. Don’t leave moisture around the piercing.
-
Choose How Often to Clean
Clean the new piercing twice daily with soap and water or saline. During aftercare, clean the front and back two to three times daily with saline or saline-moistened gauze. Keep each session gentle. More scrubbing isn’t better: repeated friction can irritate the skin and disturb healing tissue.
-
Use Gentle Products
Choose saline or gentle soap and water. Avoid alcohol, hydrogen peroxide, antibacterial soap, iodine and other harsh products. Alcohol can dry nearby skin until it cracks or bleeds, leaving the wound open. Don’t apply benzalkonium chloride creams or ointments to a dry, sore piercing, as they may irritate it and delay healing.
-
Keep Hands and Contact Clean
Touch the piercing only when cleaning it, and wash your hands before every session. Avoid handling the jewellery throughout the day, even if it looks clean. For a child’s earlobe, gently clean the skin and earring, then dry the area. Don’t remove a new earring just to clean it. Keep it in place until healing is complete.
-
Keep the Routine Consistent
Use clean gauze or a fresh disposable tissue each time. Prepare the saline mixture with clean water and a clean cup, and don’t reuse gauze or a tissue that has touched the ear. Check both sides for residue, then dry gently. Stop using any product that causes irritation and return to simple saline or soap and water.
Protecting the piercing from dust, dirt, pressure and friction
An earlobe piercing usually takes two to three months to heal; cartilage can take up to ten months. Avoid alcohol, hydrogen peroxide, iodine, antibacterial soap and other harsh products on healing skin.
-
Clean Hands Before Touching the Piercing
Wash your hands with soap and water before touching a fresh piercing, and limit contact to cleaning. After handling a phone or shared items, wash your hands again before touching the area. Keep fingers, hair and unclean fabrics away from the jewellery. Don’t adjust it just to check whether it feels secure.
-
Keep Dust and Dirt Away
Keep bedding and clothing clean, and prevent loose hair or fabric from catching on earrings. For an ear piercing, a clean T-shirt over a pillow can provide four clean surfaces for sleeping. Turn it to use a fresh surface, and avoid sleeping directly on the piercing if pressure causes discomfort.
-
Reduce Pressure and Friction
Choose clothing and daily activities that don’t press, rub or snag the jewellery. Earrings can catch on a child’s clothing, hair, curtains or nearby plants, so secure loose hair and take care when dressing. For a navel piercing during physical activity, a hard, ventilated eye patch can shield it from tight clothing and irritation.
- Keep a healing ear piercing out of swimming pools, lakes, oceans and hot tubs. Avoid swimming for at least two to three weeks after getting your ears pierced. Water exposure and friction from wet gear can disturb the area, so plan swimming around healing rather than relying on a quick rinse afterward.
- For children pierced between ages one and four, take responsibility for aftercare until they can manage it independently. Check that earrings don’t snag during dressing, play or sleep. Explain that touching or pulling jewellery can irritate the earlobe, and guide the child to leave it alone between cleaning sessions.
- Match protection to the piercing’s location. Ears need protection from pressure during sleep and from snags; a facial piercing can rub against clothing or bedding. For nipple piercings, choose clothing that doesn’t press or catch on the jewellery. Avoid activities that repeatedly strike or compress the area, and keep hands and fabrics clean.
Use these habits alongside a consistent cleaning routine, rather than covering a piercing with tight material. For practical ear-piercing aftercare guidance, follow steps suited to a fresh piercing.
Jewellery becoming embedded in the earlobe
A tight earring can press into a swollen earlobe and become difficult to see or handle. Check the fit, don’t force the jewellery out, and take changes seriously.
- Look at the front and back of each earlobe in a mirror. Check whether skin is beginning to cover an earring or its backing, or whether swelling makes the jewellery feel unusually tight. A visible change matters more than simply noticing that the earring sits close to the ear.
- If jewellery appears to be sinking into the lobe, seek medical help promptly. Don’t push, pull or dig around the earring to free it. Pressure and handling can injure already swollen skin. If the problem worsens, get medical attention rather than waiting for the jewellery to become fully covered.
- Keep jewellery in an unhealed piercing unless a medical professional tells you otherwise. Removing it to inspect the opening can aggravate the tissue, especially if the lobe is swollen or sore. If you suspect an infection, leave the jewellery in place unless a medical professional instructs otherwise.
- Wait until the piercing has completely healed before changing earrings. An earlobe piercing usually takes two to three months to heal; cartilage may take up to ten months. Pain, swelling, discharge and redness should have gone away before you consider it healed. Changing jewellery too early can disturb healing tissue.
- Choose jewellery material with your skin sensitivity in mind. Titanium and niobium contain no nickel, making them options for people with nickel allergies. Among metal earrings, gold is described as least likely to cause an allergic reaction. Solid gold of at least 14 karat is suitable for a new piercing when it isn’t plated.
- When changing jewellery in a healed piercing, wash your hands and handle the earring carefully. Stop if the post catches, the opening feels sore or the lobe starts swelling. Don’t force a post through resistance. Leave jewellery in a fresh piercing undisturbed until healing is complete, rather than repeatedly removing and reinserting it.
For a child’s piercing, parents are advised to inspect the earlobes every 2-4 weeks for pain, redness, swelling, odour, or changes in skin colour or shape. If the child was pierced at 1-4 years old, parents are advised to care for the piercing until the child can manage it independently.
Earrings can catch on clothing, hair, curtains, plants or other surroundings and injure a child’s earlobes. During cleaning, avoid rotating or twisting the jewellery. Clean the child’s earlobe with soap, clean the earring with a suitable solution, and dry it before putting it back in.
Recognising possible infection and seeking medical care
Watch for changes around the piercing, especially pain, swelling, redness, warmth, discharge or injury. If the problem worsens, seek medical help promptly.
Check for Infection or Injury
Inspect the front and back of the piercing in good light. Compare the area with its usual appearance and note new swelling, redness, warmth, discharge or skin changes. For a child, inspect the earlobes every two to four weeks for pain, redness, swelling, odour, or changes in skin colour or shape.
Recognise Possible Infection
Pay attention to worsening symptoms, but don’t treat redness or swelling alone as proof of infection. Pain, swelling, redness, warmth and discharge can indicate inflammation rather than infection. Leave jewellery in place if infection is suspected, unless a medical professional instructs otherwise. Take a child to a doctor promptly if the piercing shows signs of infection or injury.
- Seek medical help if a piercing problem gets worse. Increasing pain, swelling, warmth, redness or discharge deserves attention, particularly when several changes appear together. Don’t wait for the jewellery to become embedded or for the skin to change shape. Untreated injuries or infections can lead to pus, inflammation, a split earlobe, swelling, deformity or embedded jewellery.
- Keep jewellery in place while arranging care for a suspected infection, unless a medical professional tells you to remove it. Pulling it out can further disturb the area. Avoid squeezing discharge, digging at the piercing or applying harsh products. Keep the area clean and dry, and note when symptoms began and whether they are getting worse.
- Take blood and equipment hygiene seriously before any piercing. Piercing breaks the skin, so sterile equipment helps reduce the risk of infection. A piercing needle is preferable to a gun because a gun can cause unnecessary tissue injury and may be difficult to sterilise. Avoid equipment that isn’t sterile, as poor sterilisation can expose broken skin to contamination.
- Act promptly if a child has a painful, swollen or injured earlobe, or one with discharge. Look for odour or changes in skin colour and shape during routine checks. A child may not describe symptoms clearly, so compare both ears and watch for tenderness or reluctance to let the area be touched. Arrange medical care if infection or injury appears.
- Use the healing pattern as context, not as a diagnosis. A piercing is considered healed when pain, swelling, discharge and redness have gone away. If any of these symptoms persist or return, don’t assume the opening is healed. A medical professional can assess worsening symptoms and advise whether the jewellery should remain in place.
Sterilisation and hygiene
Sterile equipment matters before piercing begins; careful cleaning supports the healing process afterward. Use the steps below to distinguish sterile supplies from routine aftercare products.
- Choose a professional who uses sterile equipment for ear piercing. A piercing needle is preferable to a piercing gun because a gun can cause unnecessary tissue injury and may be difficult to sterilise. This is a practical hygiene distinction, not a guarantee against every complication. Ask how the equipment is kept sterile before it touches skin.
- Keep piercing equipment separate from everyday items such as towels, phones or jewellery boxes. A clean-looking surface doesn’t prove equipment is sterile. Don’t handle piercing tools yourself or reuse anything intended for one procedure. The key check is whether sterile equipment is used during the piercing process.
- Use sterile saline labelled with 0.9% sodium chloride for routine piercing care. That concentration identifies the sterile saline described for piercing aftercare. Keep its container clean, and avoid touching the opening to skin or fingers. Follow the product’s directions and don’t pour used solution back into its container.
- Separate cleaning from sterilising. Saline helps clean a healing piercing, but it doesn’t sterilise jewellery, skin or equipment. Wash your hands before handling the area, use clean disposable gauze or tissue, and discard it after use. Don’t treat a home cleaning routine as a substitute for sterile equipment during piercing.
- Avoid soaking a healing piercing in a bathtub. Bathtubs can harbour bacteria, so use a shower instead and dry the piercing with a clean disposable tissue afterward. Don’t let a damp towel, used cloth or shared bathwater sit against the opening. Keep the area dry after washing.
- Keep jewellery in place while the piercing heals, and don’t rotate it to clean the hole. Repeated handling can disturb healing tissue and transfer dirt from your fingers. Use saline on the front and back, then dry gently. A piercing is considered healed when pain, swelling, discharge and redness have gone away.
- Make hygiene checks part of the process before and after a piercing. Beforehand, confirm sterile equipment is used; afterward, keep your hands, cleaning materials and the piercing area clean. Avoid harsh products such as alcohol or hydrogen peroxide, which can irritate healing skin. Consistent care supports healing, but sterile procedure equipment remains essential.
A professional’s use of sterile equipment helps prevent infection; avoiding bathtub soaks also limits exposure to bacteria that bathtubs can harbour during healing.
Stellar Malaysia: Ear Piercing
Stellar Malaysia offers ear piercing and jewellery options for people planning a new piercing or selecting earrings. Its range includes 14K Gold Earrings, 925 Sterling Silver Earrings, and Medical Grade Titanium Earrings. These choices help you consider material alongside personal style, especially if you’re choosing jewellery for a fresh ear piercing. For guidance on an upcoming piercing, explore the available ear-piercing options and consider which material suits your needs. Keep following the aftercare steps above once pierced, and seek medical help if symptoms worsen. Visit stellarmy.com to learn more about Stellar Malaysia’s ear-piercing options.
Make Your Next Piercing Decision With Confidence
Thoughtful after-piercing care starts before the appointment and continues throughout healing. Build a routine you can follow, watch for changes, and respond promptly if a piercing becomes more painful or swollen. These habits help you make informed decisions without treating every small change as a cause for alarm.
Your next step can be choosing a piercing and jewellery combination that suits your preferences, then preparing to care for it consistently. If you’re considering an ear piercing or want to explore jewellery options, Stellar Malaysia can help you take that step with clarity. For questions or to discuss your plans, contact Stellar Malaysia.
Choose the approach that feels right for you, and care for the piercing steadily and attentively as it heals.
Frequently Asked Questions
How do I prepare a salt soak?
Dissolve ¼ teaspoon of sea salt in one small cup of clean, warm water. Wash your hands before handling the mixture, and apply it gently with clean gauze. Use a fresh portion for each cleaning session rather than saving used solution. Avoid making the mixture overly salty, as concentrated salt water can irritate the skin around a healing piercing.
Why should parents care properly for a child’s piercing?
Parents can help prevent small problems from becoming harder to manage by keeping children’s earrings clean and discouraging them from pulling at the jewellery. Young children may catch earrings on hair, clothing, curtains or nearby objects. Check the earlobes for pain, swelling, odour or changes in skin appearance. If a child’s piercing looks injured or symptoms worsen, arrange medical attention promptly.
Should I soak or spray my new piercing?
Either gentle saline application or a soak can help clean a new piercing. For a simple routine, use sterile saline or clean gauze moistened with saline, and reach both sides of the opening. Don’t soak the piercing in bathwater. If you choose a soak, use a clean container and fresh solution, then dry the area with a clean disposable tissue.
How often should you clean a new piercing?
Clean a new piercing twice daily with soap and water or saline. During aftercare, clean the front and back with saline two to three times daily. Keep each session gentle and avoid extra cleaning when the area looks normal. Repeated rubbing can irritate healing skin, so focus on a consistent routine rather than scrubbing.
What are the signs of an infected piercing, and when should you see a doctor?
Increasing pain, swelling, redness, warmth or discharge can signal a problem, but these changes can also reflect inflammation. Seek medical help if symptoms worsen or the piercing becomes injured. Don’t remove jewellery because you suspect infection unless a medical professional instructs you to. For a child showing signs of infection or injury, arrange medical care promptly.
What should you do if a piercing becomes swollen, irritated, or develops a bump?
Reduce pressure on the area and monitor whether swelling or irritation is getting worse. Ice can help manage swelling; wrap it so it doesn’t rest directly against the skin. Don’t twist or force the jewellery, and leave it in place if infection is suspected unless a medical professional advises otherwise. Seek medical help if the problem worsens.
When can you change or remove jewellery after getting pierced?
Wait until the piercing has completely healed before changing or removing its jewellery. Healing is indicated by the absence of pain, swelling, discharge and redness. Even a healed piercing may shrink or close within minutes after jewellery is removed, so avoid leaving it out if you want to keep the opening. Don’t force jewellery through resistance or soreness.
How should you care for ear, nose, and body piercings differently?
Adapt protection to the piercing’s location and the friction it faces. Ear jewellery can press against bedding, while facial piercings may rub against clothing or other surfaces. For a navel piercing during physical activity, a hard, ventilated eye patch can shield it from tight clothing. Keep each area clean, avoid unnecessary touching, and follow the healing needs specific to its location.